Showing posts with label knit. Show all posts

Monday, July 30, 2012

Oh gosh the increases...

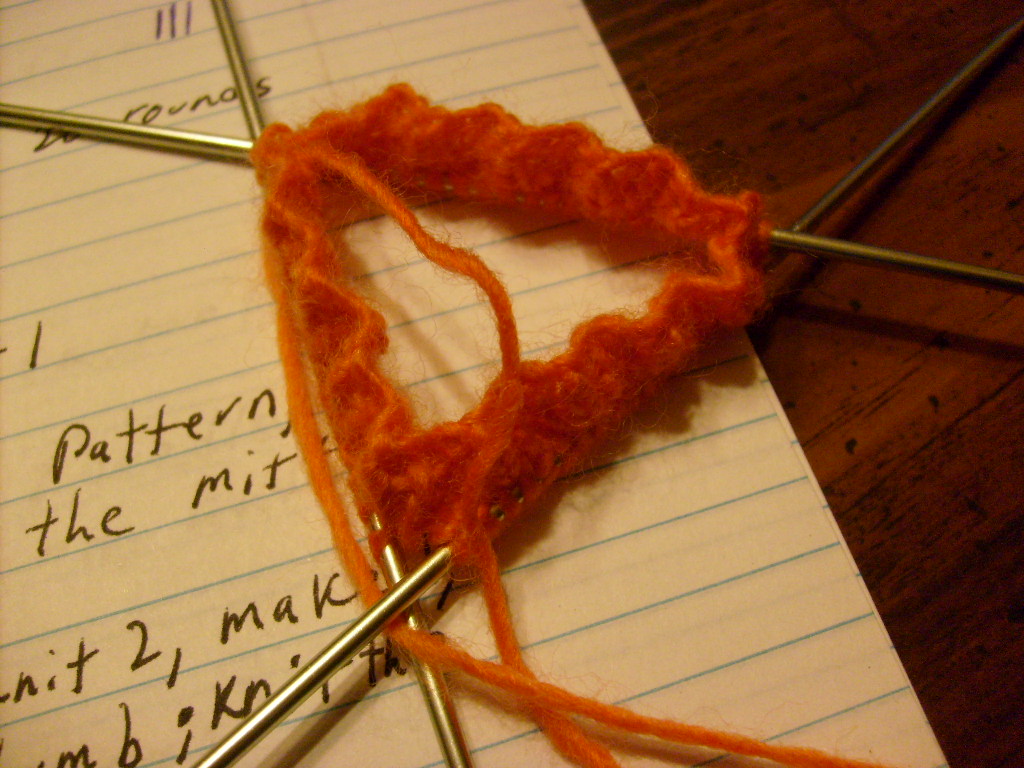
Yep, I took it off to try on.  And by try on, I mean "prove the pattern isn't wrong".  It feels like so many stitches when it's on the needles and looks like it ought to be big enough.  Ah well, at least I can now rest assured the neck hole is the right size.  The pattern says to "measure snugly around your neck", and I'm sorry but I just don't do tight neck holes.  So I measured where I wanted the neck line to be, and I'm glad to see it's working out.

Did I ever mention the pattern I'm using?  It's the Incredible Custom-Fit Raglan, (rav link here) which has been done successfully loads of times, so I really shouldn't be doubting it.  But I'm impatient and every round just keeps getting bigger!

I will say that I'm very happy with my increase lines.  I'm doing mirrored "lifted increases", though to be fair I don't bother with the lift part and just shove my needle into the middle of the stitch, and I love how when you look at it the other way it looks like decreases.  Actually, it kinda looks like a triple decrease, which is awesome because I almost never have use for those.

Of course, after taking all the stitches off onto waste yarn I now have to feed them all back onto the needle...

Sunday, July 29, 2012

And the games begin!

We are now officially (about) 2 days into the event (and by two days I mean this is the second time I'm contemplating going to bed since starting this project) and I am officially 3 stripes done with my sweater.


I can't wait to get past the raglan increases...

Thursday, July 26, 2012

The 2012 Ravellenic Games

So, after a bit of hubbub all over the internet for a while there, Ravelry's Olympics-timed event is now rechristened and about to start.  Honestly, if it wasn't for the crazy I wouldn't even care about the event.  As it is, USOC and their ill-worded letter have made me actually want to participate this year.  Not sure if that counts as a fail on their part...lol

Anyway, my head first leap into the crazy is a sweater.  Ok ok, don't send the mental health police 'round this way just yet.  Are you really crazy if you are aware you are crazy?  Besides, I've been wanting to knit another sweater for a while.

Totally crap-tastic photo of the stripes I'm doing!  That's brick red, a color called "melon" which is an orangey-pink, and yellow.  It'll be a top down raglan.

The event starts July 27 at 4pm EST.  That's not even two days from now.  Oh crap.

Wednesday, July 25, 2012

1846 Driving Mitts - Final Update and Pattern Notes


I have finally finished the second mitt!  The first one took four days, the second took two weeks.  Darn second mitt syndrome...lol


So on to the Pattern Notes:

 Needles and Yarn: Fingering weight yarn and 2.25mm (US size 1) DPNs
The patterns calls for "4 pins No. 15 and 4-thread fleecy".  It didn't occur to me until later, but "4-thread" obviously means "4 ply" which is still a term for "fingering weight" in many places.  I mean, it was obvious anyway, but I'm surprised I didn't put that together.

Thumb Gusset: The shaping is very straightforward.  I would say the only potentially confusing part is were it says to "work the pattern on the thumb".  I say potentially confusing only because the stitch count on the thumb changes and you have to pay attention to where you're putting your purl bumps.  I ended up charting it out to where you put the thumb stitches on a holder.

Changes I Made (and assorted "could go either way" decisions):
- After placing thumb stitches on holder, I cast on 8 instead of 7.  This was to keep the stitch count a multiple of 4.
- I counted the cast on stitches as the start of the next round instead of the end of the previous
- After picking up the 8 stitches and 14 held stitches for the thumb, I needed to either add or lose 2 stitches to keep a multiple of 4.  I chose to decrease where the held stitches met the picked up stitches, thereby decreasing 2 and preventing gaps in one shot.

Tuesday, July 10, 2012

First mitt - complete!

Well, ok...I still have to weave in ends.  But the knitting is done!


I opted to do less stitches on the thumb rather than more.  I figured the decreases would do well to hide and wonkiness from where the knitting met the picked up stitches, and it seems to have worked

I followed the instructions for the ribbing length exactly, even though I was a little worried about the length of the thumb - I've had to shorten thumbs in the past.  But my fears were ungrounded and it's just about perfect.

I still have to knit a second one, but here's my thoughts about this pattern at the moment:
- What are the odds that I'd find an ancient pattern, sub in yarn and needles I happened to have handy, and end up with something that fits perfectly?
- This is the sort of thing that if I'd seen a picture I probably would have passed on as uninteresting.  I'm actually glad this pattern had no picture.
- The stitch pattern seems so bland on paper, but when knit up like this is actually really nice.  I'm adding it to my "simple but so awesome" mental file, along with ribbing, seed stitch, and garter stitch.  Sometimes simple can also be perfect.
- I confirmed my dislike of singles yarn while knitting this, but I love the result.  It's warm and soft...and will probably pill like crazy.  Oh well, I knew that going in. :P

Monday, July 9, 2012

Making Progress on the 1846 Driving Mitts


Can I just say, I love the texture of these!  It's almost a diamond patterns, but at the same time it's still mostly stockinette.  It's absolutely gorgeous.

I've been following this pattern as faithfully as I can.  Some parts are vague of course.  I like that this pattern was written assuming that the knitter knows what they are doing.  I mean, I know that's pretty much standard for patterns of the era, but still.

That's not to say there haven't been parts that I've had to fudge/figure out because it was vague.  The instructions for the thumb say to work the stitch pattern on the thumb, but since the thumb's stitch count is changing every couple rows you actually have to think about where you're placing your purl bumps.  I ended up charting it out, which would probably be a good idea even if it was row by row instructions.

I have tweaked just a couple things though:
- The instructions for an increase that are written in the beginning of the book amount to a yarn over.  I didn't want any holes, so I substituted a backwards loop.
- It instructs you to cast on 7 over the thumb hole.  Doing so results in an odd stitch count, so I cast on 8 instead.  I figure a one stitch difference won't make a lot of width difference, and it has the advantage of keeping the stitch count a multiple of 4.  I plan on doing a similar thing with the thumb - as it is written the thumb will be 21 stitches around - 22 with the extra cast on.  I'll have to see when I get there if I go for increasing or decreasing.


Sunday, July 8, 2012

An Undertaking of Historic Proportions

Ok, not so much.  But I wanted to fit the word "historic" in there.

I've mentioned Nerd Wars before, right?  One of the challenges this month is to craft something related to the history of our craft.  At first, I wasn't so sure about this.  Sometimes a challenge will grab me immediately, sometimes I never come up with something, and usually it's somewhere in the middle.  I was originally thinking this one fell into that second category.

But then I remembered something.  Something absolutely perfect.  Years ago I went looking through google books for free knitting/crochet books, focused mostly on the really really old stuff because, well, it was more likely to be free.  Also it was really cool seeing the way people described these crafts way back when.

I never really tackled any of the patterns seriously.  Even though I was a pretty decent knitter back then, most things would require quite a bit interpreting and guessing about appropriate yarn and needles, and I just didn't have the patience.  But now...now I have a reason!

This time around I went looking for something that A) Wouldn't take tons and tons of interpreting, B) Something I had a purpose for, and C) Something that looked fun to make.

The answer?  A pattern for "Driving Mitts", which is just an old fashioned way of saying Fingerless Mitts.  What's old is new again, right?  And perfect because I've so been thinking about them a lot lately.

For those curious, the book is Knitting, crochet, and netting by Eléonore Riego de la Branchardière (totally copy pasted that name, lol).  The pattern is simply called "Driving Mitts" and is on page 31.  This book was published in 1846 in London.  So cool.

So, to knitting.  The pattern itself seems pretty straightforward.  The yarn and needles I of course had to guess at.  The pattern called for "4 Pins No. 15, 4-thread Fleecy", and while I know that back then the bigger the needle size the smaller the needle, that's all I know.  I haven't the slightest idea what "4-thread fleecy" is, perhaps a brand?  But the stitch count and small needle says "sock yarn or similar" to me.  The pattern calls for 56 stitches to be cast on, which is right within range of sock yarn weight patterns I've been looking at recently.  Apparently no one thought gauge was an important addition to patterns back then.

I happen to own one set of sock size needles - maybe two but if I have a second set I have no idea where it's at.  This pair is, apparently, US size 1 - which is 2.25 mm.  Looking at how "size 1" is just as arbitrary as "No. 15", I have a sudden desire to start using mm sizes exclusively.

Someone in the NW challenge thread posted a link to a conversion chart of old needle sizes for those who might be tackling old patterns, and said chart says a 15 is a lot smaller than what I've got.  But I've just got the one set.  And as I've been looking at newer fingerless glove patterns off and on for days, this size plus fingering/sock weight yarn seems right on track to make something that will fit me.

Digging through my meager thin yarn stash, I finally settled on some Knit Picks Chroma that's a wonderful orange colorway.  Since I'm guessing with yarn and needles anyway, I figured I'd just knit the cuff and see if it fits.

I actually finished the cuff this morning, but got impatient before then and tried the cuff on at about 10 rows in.  It fits, so yay, good sign!  I'm just now starting the actually patterning part, so we'll see how that goes.

You can follow my progress here at my public Ravelry project page, though I'll try to remember to post updates here about it because this is just so cool.

Monday, July 2, 2012

Fingerless Mitts vs Fingerless Gloves

I've hit a sudden fingerless glove kick.  You know, the kind where you look at patterns and think about actually knitting them.  As nearly everything I'm interested in is done in fine weight yarns, I have doubts any of them will actually materialize.

One thing I've noticed whilst browsing through Rav's pattern database is that all the different types of fingerless hand covers get lumped into the same pile.  Not just on Rav, that's just limits on available search parameters, but with designers.  As a general rule, you can say that fingerless mitts are "chopped off mittens" with one big finger hole, and that fingerless gloves are, well, "chopped off gloves" with individual finger holes.  But it's not universal.  And that makes me wish I could mandate this for every designer now and into the future.  I want to be able to type "fingerless gloves" into google and get actual fingerless gloves.  Not fingerless gloves mixed in with fingerless mittens.  Ok, maybe that's too much to ask of google.  But it would be nice to be able to look at the pattern name and know instantly what kind of finger holes you're getting even when the picture is artsy and the fingers are hidden (what's with that?).

So can we all agree?
Fingerless mitts = one big finger hole
Fingerless gloves = individual finger holes

Thanks in advance. ;)

PS: There is a serious shortage of fingerless glove patterns out there, at least compared to fingerless mitts.  Yeah yeah, mitts are easier to design, blah blah.  I guess fixing that is up to me, huh?

Thursday, December 29, 2011

Sweater Done!


In time for Christmas even!  Thank you Shady Cels for the wonderful encouragement!

Thursday, December 1, 2011

Snow, Sweaters, and "Failure"

I'll admit it.  I gracefully dropped out of NaNo a few days ago at 21k words.  I just really wasn't feeling the story at all, and there's no shame in realizing that.  Is there a part of me that wishes that this wasn't my first non-win?  Of course.  But as I didn't enjoy writing this story most of the time, pushing through to 50k would have just been a waste of my mental energy, which I've been lacking in lately anyway.

It's December, which marks the third round of Nerd Wars on Ravelry.  I don't know if I've posted about it before.  One of the challenges this round is to finish a WIP.  So I'm digging out my "Obnoxious Christmas Sweater".  The sweater I've only got a front finished on.  Hey, I've seen people start and finish sweaters within a month, so I'm going for it.  Back and sleeves.  I want to get it done in time to wear for Christmas, but I'll be happy with just finishing it.


 What do you think?  I love it, which is why I want it done.

We've also just had the first snow of the year.  A piddly little dusting overnight that barely did anything and melted by noon.  But still, first snow of the year baby!  I'm ready for snow and cold for some reason.  I'm tired of it bouncing around between 60 and 40, I'm tired of rain, and I just love snow.

So happy December everyone!  Only 25 days until Christmas.

Friday, February 11, 2011

Loom Madness?

I walked into Joann Fabric today planning only to get the single ball of yarn I need to complete the shawl I'm working on. But of course I can never stop there. Today's random purchase was a smaller gauge knitting loom, specifically a knitting board meant for double knitting and flat panels, and a kid's potholder loom.


I'm rather pleased with this star square I made following the instructions my new knitting board came with. I mean, sure it's a little wonky, but it's freaking double sided!

As for the potholder loom, I'm not taking pictures of that. I must say, I'm slightly disappointed that it didn't come with enough loops of each color to make the cool, two colored potholder that's on the box. Fortunately, I mostly want to use the loom to try weaving with yarn. You know, once I get the chance to figure it out...lol In the meantime, it's kinda neat to weave and unweave the loops. Not that it really makes a potholder of my thickness preferences.